Taxidermy Reference Photos and Tanning Supplies for Taxidermists
Pre-sculpted ear butts are not going to be very forgiving when it comes to location placement on the head. Once they are locked into place they are “there.” Too far back could pull out the back corner of the eye, too far forward could make it hard to close and sew the incision, too low might pull from the antler burr. Too much tension on the skin could keep you from getting a good seat in the socket. If you have plenty of skin in the right places, it can be taxied back toward the ear, relieving pressure and allowing a seat.
If everything is proper, everything will pretty much fall into place and stay there.
The mannikins you use may or may not “fit right up.” If they do, great. If they don’t, they can be altered.
Keep a notebook with measurements you have personally taken. Note also the location from which the deer came if out of your home area.
The center of the nose and the front corner of the eye are good starting points for gathering head and face measurements.
Using a “non-stretchy’ string and a fine point marker to mark the critical measurements will aid greatly. Follow the same contours on the mannikin as you did on the deer.
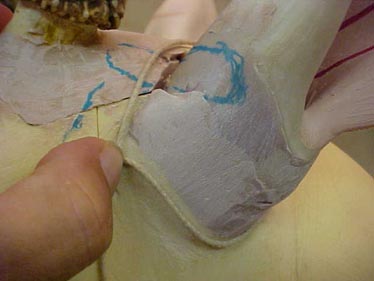
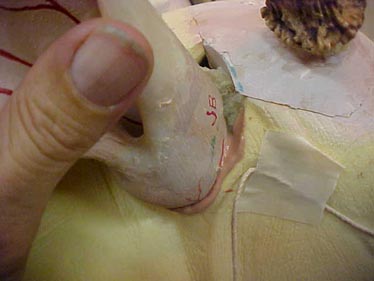
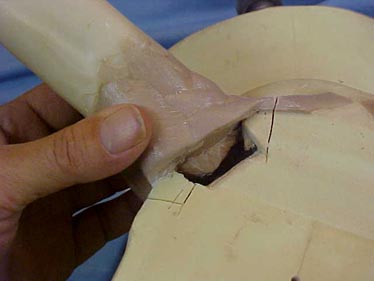
Illustrated here is the nose to tip of ear measurement. The socket is correct in placement for the butt muscles. Just in front of the thumb and finger is the reference mark. A straight pin is set in the center of the nose. It will serve as a pivot point. Swinging the string to the other side and using the same reference mark will assure correct ear and butt lengths.
Concerning measurements: The one you don't have is the one you always need!
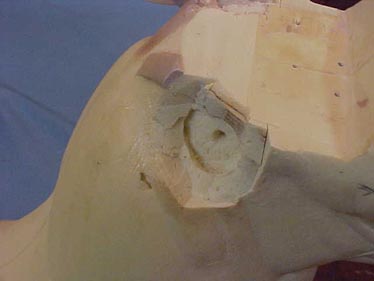
Using calipers and a marked string will help you determine how much meat needs to be replaced where.
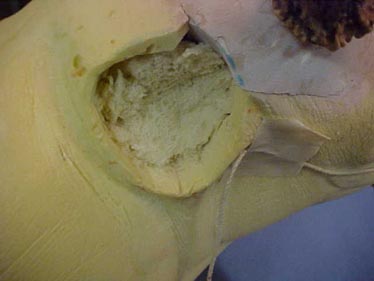
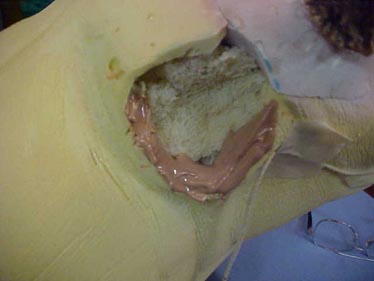
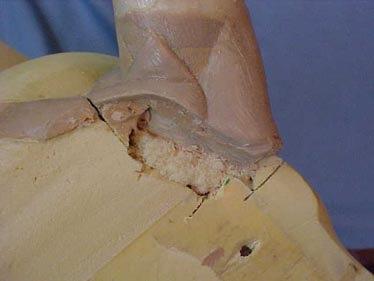
By placing bread in the socket, you can regulate the thickness of your body filler.
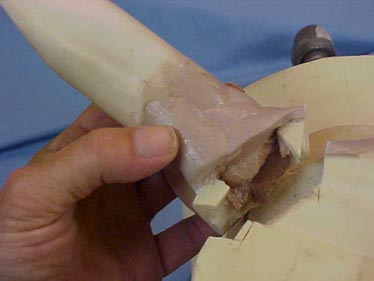
A small amount of body filler is all that is needed to make the initial bond.
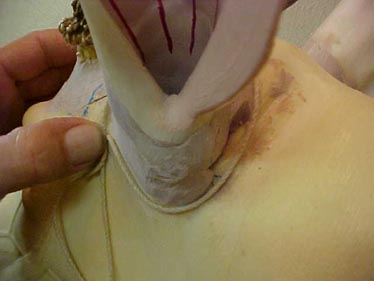
You will notice a red line on the ear base right at the edge of the body filler. You will also notice arrow points in red. These were line-up marks for placing the ear in the desired position. The string is hanging there to verify length when needed.
If placement is wrong, pop the ear back out and clean off he body filler before it hardens.
Notice how the bread has stopped the body filler from getting into the slots made by a knife blade? Use plastic milk jug strips to keep body filler out of the incision lines.
A 4” fillet knife will cut through the foam.
The bread crumbles and cleans right out and you have good surfaces to glue the ear back into position.
Use your hide paste to glue the ear back into place when you are ready to mount. Everything will lock back into place.
It’s no secret. Disposable income varies throughout the nation and even within a state. From the standpoint of financial practicality, a taxidermist will have to charge more for pre-sculpted butts. Time or additional expense aren’t going to be much of an issue for the hobbyist or competitor.
From the standpoint of practicality, a longhaired winter coated northern deer mount would gain practically nothing from this technique.
Southern deer and early archery deer could make this technique a realistic possibility.
The biggest thing to be gained would be by the taxidermist.
Doing a few mounts with this technique makes you focus, it makes you think and it makes you see the ear and the muscles that work it.
These self-drills can improve your soft sculpting, resulting in improving the quality of your work.
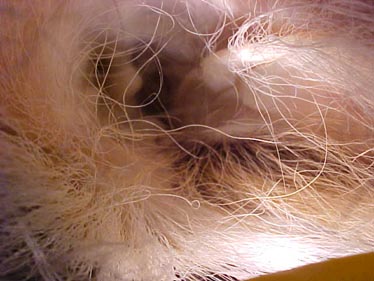
This photo was taken 3 days after the ear was mounted. The skin and adhesive were still soft but slightly firm (did that make sense!?!). At the week mark, the ear canal was dry and the wrinkles had flattened considerably in drying. The color had become more clear. All the cartilage had been removed from the ear. Excessive amounts of Fin Cream had been applied inside the lower part of the ear liner before insertion and then worked back up in to the inner ear detail.
This is starting to get close, for those who like to challenge their personal skills and ingenuity, here’s your challenge!